How to Make a Bootable USB Drive?
A lot of people don’t know how to make Bootable USB Drive. Today I’m going to tell you the easiest method to create a bootable USB. I always use the latest version of Rufus to create bootable Flash Drive because it supports both (GPT & MBR) hard drive types which mean that we can make bootable USB according to our Hardware Type.
Requirements:
You will need Rufus and Windows ISO File for creating the Bootable USB.
- Here are the download Links of Rufus, click on Download.
Download (Rufus Official Site Link)
Download (Rufus Alternative Link)
- Suppose we are creating Windows 10 Bootable USB. Click on Download to Download the ISO File of Windows 10.
Download (Windows 10 Free ISO) - Click on Download Tool Now, then Run it's .exe file and follow the instructions.
Note: You can also download the ISO Files of other Windows from the Official Website of Microsoft.
Check your Drive Type:
First of all check, you should check that what type of drive you have, and for this, follow the steps:
- Go to Search Bar and Search for “Disk Management” and click on “Create and Format Hard Disk Partitions.”
- Select the disk on which you wish to install windows, do Right Click on it, and open “Properties.”
- Navigate to the “Volumes” Tab. Under this tab, you will see “Partition Style.” This will be your Hard Drive Type.
Make Bootable USB using Rufus:
- Insert a USB drive into your System (at least 8 GB USB Drive).
- Open the .exe file of Rufus and install it.
- Rufus Dialog Box will open and it will automatically locate the Device you will insert into your PC or Laptop.
Note: If you have more than One USB inserted, select the device you want to make bootable from “Device” named Dropdown.
- Now from the “Boot Selection” Dropdown, Make sure to select “Disk or ISO Image.” After that click on the “Select” button, then select and open the ISO file you just downloaded from your PC.
Note: The latest version of Rufus also gives the option to download the ISO files of Windows 7, Windows 8.1, and Windows 10; you can also download the ISO from there.
- Select “Standard Windows Installation” from the next “Image Option” Dropdown.
- The next step is to select Partition Scheme. It will display 2 options (GPT and MBR). Select one option according to your Hard Drive Type. And leave the “Target System” as it is.
- Now from the Format Options, Write the name you want to give to your drive in the “Volume Label” Text Box.
Note: You can even leave the volume label text box as it is.
- Now Leave the Default Settings of File System and Cluster Size.
- Click Start and you will see the following Warning.
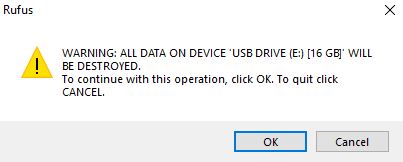
Click Okay, it will format all the data from your USB.
Note: If you have anything important in your USB Drive, Make sure to keep the Backup of those Files in another drive.
- If you see that the Status changes to “Completed” then it means that you have successfully created the Bootable USB and now you are good to go. You can install windows on your PC using that USB.
Posted: 05 Sep 2021

Visit for more
() () ()

ZainabGhuryani
never heard of this usb before.
()
()
(1118 days, 10 hours, 31 minutes ago)
Misbah
ZainabGhuryani we make bootable USB for the Installation of Windows in our Computer or Laptop.
()
()
(1110 days, 6 hours, 8 minutes ago)

drone036
good insight
()
()
(299 days, 23 hours, 6 minutes ago)